Web Analytics

Tuesday, 10 December 2013

Sambar Recipe(Idli Side dish)


Idli Sambar Recipe


There are many varieties of sambar which can be prepared based on our taste. I am going to add idli sambar recipe below. You can add any vegetable of your choice to this sambar. I will add those notes at the last.

    Ingredients

  • Tamarind juice-1/2 cup
  • Turmeric powder- 1tsp
  • Salt-1tsp
  • Hing - a pinch
  • Chili powder-1tsp
  • Tuvar dal/ Toor dal-1/2 cup
  • Sambar powder 1 1/2 tsp
  • Tomato- 1(chopped, optional)
  • Curry leaves- few
  • Oil-1 tsp
  • Urad dal-1 tsp
  • Mustard seeds-1 tsp

Preparation Time: 40 Minutes

Serves: 2

Method:

Cook tuvar dal in a pressure cooker for 3 whistles. After it gets cooled mash well and kept it aside.

Take a lemon sized tamarind add it to bowl of hot water, extract think tamarind juice. Throw away the pulp. Boil the extracted tamarind juice in a vessel with sambar powder, salt, hing, chili powder, turmeric, tomato. Let it boil for some twenty to thirty minutes. Check to see if the level of the boiling liquid has gone down little. Now add the cooked tuvar dal and mix well. Add sufficient water. Take a pan heat a tbsp of oil splutter mustard and urad dal. Add it to the boiling sambar and switch off. Add curry leaves and hot spicy sambar is ready to serve.


Notes:

1. Onion and tomatoes goes well with this sambar generally. I wanted to post an onion less version so i did not add it here.
2. You can add any chopped vegetables like carrot, potato, drumstick, radish, etc.
3. You can even splutter use red or the sliced green chilies to the sambar instead of the chilli powder. It will add more spiciness to the sambar.

Thank you for spending your time & visiting my blog.

Share Button

Thursday, 28 November 2013

Poori Masala Recipe


I love poori's from my childhood days. Who does not like the sight of hot puffed up Poori with the aromatic smell of potato masala. Look below to make a note of this wonderful recipe!


Ingredients

For Poori Dough

Ashrivad or Pilsbury atta Preferable(I use Ashirvad)- 1 Cup 
Oil- 1 tbsp
Salt-1 tbsp
Water- Required quantity

For Masala

Potatoes- 3 ( Boiled,peeled & mashed)
Oil- 1 tbsp
Mustard seeds- 1 tbsp
Urad dal- 1 tbsp
Green Chilly- 1 or 2(sliced length wise)
Onion-1/4 cup
Tomato-1(chopped)
Salt- To taste
Turmeric Powder- 1 tbsp
Hing -a pinch
Curry leaves- few
Ginger- grated or thinly cut(few)
Cuisine : Indian

Category : Breakfast

Time : 50 minutes

Method

Pressure cook potatoes for 3 to 4 whistles & after it gets cooled peel the skin & mash it gently. 

Take a pan, heat few drops of oil, splutter mustard & urad dal. Add the sliced green chilies, chopped onions & wait till onions change color. Don't fry the onions much as it may spoil the taste of the masala. Now add the salt, hing, turmeric, tomato & the curry leaves(I usually add spices at this stage, because the flavor gets mixed well nicely). Fry for few minutes. Now add the mashed potatoes with 3 glasses of water. Now mash the potatoes well to see the water gets thick & you can see it turn yellow. Switch off after five minutes. Serve with hot poori's.

For the dough, take a cup of atta(of your choice) & add 1 tbsp of salt & oil. We add oil to get a soft dough. Start mixing the mixture by adding water little by little. The mixture should not be watery. This is because poori's will absorb lots of oil when you fry if it has moisture. So, the dough should be thick than chapati consistency. Leave it for 30 minutes.

I use a poori presser for making pooris. If you don't have one here are the steps you need to follow. 

Roll the dough into a long strip.  Cut it into small pieces & roll with some oil.Roll it to form a round shaped poori. Fry it when the oil is at high temperature as you get crispy poori's then.

Now the Poori Masala is ready to be served.

Enjoy ! 

Wednesday, 16 October 2013

Split Green gram dal/Parupu Payasam


This payasam is too tasty to ignore. Both my ammas used to prepare this during festivals or during any special occasions. This can be prepared in no time. We can prepare this using sugar as well as Jaggery. I love the taste of jaggery more than sugar as it tastes more authentic. Here is the quick recipe.
Ingredients
  • Split Green gram dal - 1/2 cup
  • Jaggery - 1/4 cup(add to taste) OR Sugar - 3 small cups
  • Milk - 1/2 cup


  • Ghee- 3 tbsp
  • Cashews & nuts- few
  • Elaichi/Cardomom powder - 1 tbsp


Serves
2

Preparation Method
Boil water & add sufficient jaggery for the payasam & keep it aside to extract juice after some time.Take a pan & add few drops of ghee. Fry the cashews & keep it aside. Now fry the split green gram dal on the same pan till the dal turn slight brown. I just love the aroma that comes during this process.


Now add the milk kept to boil along with dal & mix well. Let it boil for some time. Meanwhile filter the jaggery extract leaving the impurities. You can now see the dal cooked by now & the payasam would have turned little thick. Add the jaggery juice & cardomom/elaichi powder. Mix well. Leave it for some time. Once you get the cooked stage switch off. Offer the payasam as neivedyam & serve hot.

Tuesday, 1 October 2013

Navratri Special - White Kondakadalai/Chana Recipe


White kondakadalai is a healthy legume that can be used to prepare side dishes for chapati as well as like Sundal for occasions. During Navaratri we prepare sundal using it during Saraswathy pooja. Now lets see how to prepare Sundal using this White Channa.

Ingredients:
  • White kondakadalai/Channa/Chickpea - 1 cup
    • Oil - 1 tbsp
    • Mustard Seeds - 1 tbsp
    • Curry leaves - few
    • hing - a pinch
    • Salt - To taste
    • Turmeric - tbsp
    • Red Chillies - 3 crushed
    • Grated Coconut - few grated


    Preparation Time:
    20 Minutes

    Serves:
    2

    Method:
    Soak white kondakadalai/chana the night before you want to cook.Pressure cook the white Kondakadalai/chana by adding a tbsp of Salt. This will add more taste.


    Heat the oil in a pan splutter mustard seeds. Add required salt,turmeric, curry leaves, crushed red chillies & hing. Mix well for few minutes. Finally add the grated coconut & allow it to turn golden. Spicy yummy Kondakadalai/White Chana sundal is ready to serve for this Navaratri.

    Thank you for spending your time & visiting my blog.

    Share Button

  • Monday, 30 September 2013

    Navaratri Special - Peanut/ Verkadalai Sundal


    Navratri reminds me of spicy sweet sundals for all 9 days. Start reading below for the short & quick recipe of Peanut/Verkadalai Sundal. This is one of the easiest Sundal to make as it does not take much effort to make.

    Ingredients:
    • Peanut / Verkadalai - 1 cup
    • Coconut - Grated (few based on taste)


    • Oil - 1 tbsp
    • Mustard Seeds - 1 tbsp
    • Urad Dal - 1 tbsp
    • Salt - To taste
    • Curry leaves - few
    • Hing - To taste
    • Red chilly - 2 to 3
    • Peanut Sundal


    Method:

    Soak Peanut immersed in water few hours before cooking. Pressure cook for a whistle & keep it aside. Dont give more than a whistle as the peanut may turn too soft. Heat oil in a pan splutter mustard & urad dal.


    Add the chillies, hing, salt & the cooked verkadalai/peanuts. Mix well & allow it to fry for sometime. Lastly add the grated coconut & once they turn golden brown switch off. Hot spicy Peanut/Verkadali Sundal is ready to serve for this Navaratri.

    Thank you for spending your time & visiting my blog.

    Share Button

    Friday, 13 September 2013

    15 Minutes Moong dal recipe


    Ingredients:
    • Oil - 1 tbsp
    • Mustard seeds- 1 tbsp
    • Urad dal - 1 tbsp
    • Curry leaves - few
    • Green chilly- cut into pieces few

    • Moong dal - 1/4 cup
    • Water- 1 cup(if required)

    • Onion - 1 finely chopped
    • Tomatoes- chopped 1/2 cup
    • Turmeric - 1 tbsp
    • Salt - To taste


    Serves :
    2
    Preparing Time :

    15 minutes

    Method:
    This is such an easy recipe for working women who break their heads to make side dishes for dinner. I learnt this recipe from my mother. It takes not more than 15 minutes to prepare this side dish. This tastes yummy & even kids will love it. This serves the best side dish for crispy dosas, hot chapatis & any dish you wish to try.

    Here goes the recipe. Pressure cook Moong dal for a whistle. Cut onion,tomatoes, chillies finely & keep aside. Heat oil in a pan allow mustard seeds & urad dal to splutter. Add the curry leaves, chilles & fry fore few seconds, Then add the onions & wait till turn golden brown. Then add the tomatoes & fry for some time. Don't always put tomatoes & onion together as onions wont fry well.


    Add the required salt & turmeric. Mix well and add the boiled & mashed moong dal along with some water. Allow it to boil & switch off after few minutes. Don't add too much of water as it will spoil the flavor. You can even add Sambar powder & garam masala powder if you want the gravy to be more spicy & thick.

    Hot delicious Moong dal is ready to be served.

    Thank you for spending your time & visiting my blog.

    Share Button
    Peep in for the Bachelor cooking contesthosted by Shruti


    Monday, 12 August 2013

    Vazhaithandu porial


    Vazhaithandu/raw banana stem is an excellent source of fibre & it helps in weight loss. It also helps prevents constipation.

    Preparing recipes with Vazhaithandu is said to be an pain as it involves lot of process. I don't buy banana stem usually as i wont get time to do all those initial process of removing the skin, cutting, etc etc.. I try once in a while & so thought of posting the recipe of when i made it yesterday & i have not been posting for a long time since i was stuck up with my work schedule. So spent some time in publishing this recipe this recipe at last !

    Ingredients:
    • Vazhaithandu - Chopped 1 cup
    • Butter Milk- 1 cup (used while cutting Vazhaithandu)
    • Mustard seeds - 1 tbsp
    • Urad dal- 1 tbsp hing - a pinch
    • Split green gram/moong dal - 1/4 cup
    • Water - For cooking
    • curry leaves - few
    • Oil- 1 tbsp
    • Coconut- 1/4 cup grated
    • Green Chilly - 2 or 3
    Preparation time
    30 Minutes

    Serves
    2

    Method
    Remove the outer skin on the Vazhaithandu using a knife. There may be 2 to 3 outer rolls of this vegetable which has to be removed before we reach the main stem. Once we remove the outer covering we can chop all the stem finely. We need to soak the chopped stem into buttermilk for sometime till we prepare for cooking it. This is done mainly to avoid discoloration of the vegetable. We can keep store it in a fridge like this to be cooked the next day.

    Now we can add the chopped Vazhaithandu along with the split moong dal with essential water required for cooking. Add turmeric, salt, a pinch of hing, curry leaves & leave it to cook.


    Grind the grated coconut along with green chillies to a paste. You can use red chillies too based on your requirement & taste.

    Change to a bowl once the vazhaithandu gets cooked. Heat oil in a pan, add mustard & urad dal. Let it splutter. Add it to the cooked Curry. Serve Hot & enjoy the traditional taste of Vazhaithandu Porial.

    Tuesday, 9 July 2013

    Home made Delicious Rasgulla Recipe


    Home Made Rasgulla Recipe
    Rasgullas Recipe

    Rasgulla is an cheese based dish popular in India. The dish originated to Odisha. Rasgullas are made from an Indian cottage cheese & semolina dough ball. They are made small shaped dumplings & cooked in light sugar syrup. Source:wiki

    Rasgullas were my all time favorite. Appa used to buy haldiram rasgulla a week before diwali & we used to sneak up onto it. So when i read about the preparation of home version online i thought of giving it a try.

    Here is the recipe I tried & ended up with yummy big Rasgullas.

    Ingredients

    • Milk(Full Cream) - 1 Litre
    • Sugar - 2 cups
    • Water - 4 cups
    • Lime juice/vinegar- 2 to 3 tbsp(I used lemon)
    • Nuts - To garnish
    • Cardamom/Elaichi Powder - 1 tbsp


    Preparation Time
    60 minutes

    Serves
    25 tasty Rasgullas

    Method

    Rasgullas are made out of soft panners/cottage cheese. You can view from here home made panners along with an panner butter gravy recipe.

    Here is the short version for you all.

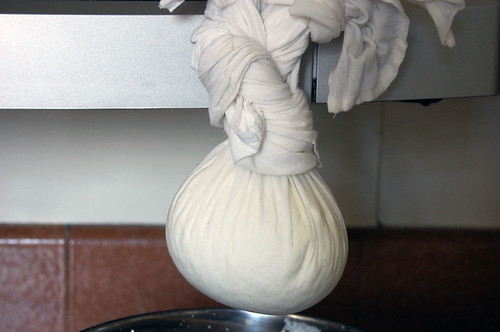
    Heat a litre of milk by adding few drops of lime juice. When the milk starts curdling switch off & after it gets cooled filter out the whey using a cheese cloth. Wash the panner under water to remove the smell of lemon. Hang the cloth around 40 minutes by draining out all water out of the panner.


    After the allotted time take out the panner which would be in an crumbled up shape.


    Knead the panner well using your hand & make it into a dough.


    You have to keep in mind that the panner would become large once its put to boil so keeping that in mind roll into small equal sized balls. I got around 25 smooth balls.

    Heat the water by adding 2 cups of sugar, cardamom/elaichi powder. Once the sugar dissolves & the water becomes a syrup add the small panner bolls one by one slowly.


    Cover it for some time & cook till the panner becomes big Rasgullas. Leave it to cool refrigerate & serve delicious home made Rasgullas.


    Note

    1.You can use pressure cooker also to make Rasgullas. Just boil panners for a whistle after water starts boiling.
    2. Sugar syrup should be of thick consistency otherwise Rasgullas might taste watery.
    3. Refrigerate for nearly 6 hours so that the sugar syrup gets completely into the rasgullas.

    Thank you for spending your time & visiting my blog.

    Thursday, 27 June 2013

    Parupu Usili recipe with beans


    Parupu Usili recipe with Green Beans

    I have never prepared usili dishes until i met my husband.Parupu usili is an traditional south indian recipes.(veggies cooked with spicy ground lentils) thats can be made with banana flower, cabbage or beans.

    Beans usili is one of my husband's favorite dish & so i learnt it from my MIL & amma.

    Ingredients:
    • Green beans- 1 Cup
    • Chana dal(kadalai parupu) - 1/2 cup
    • Tuvar dal- 1 cup
    • Chilly- 4
    • curyy leaves - few
    • Turmeric - 2 tbsp
    • Salt- to taste
    • Hing - a pinch
    • Oil- 3 to 4 tbsp
    • Mustard Seeds- 1 tbsp
    • Urad dal - 1 tbsp


    Cooking Time
    40 Minutes

    Serves
    2

    Method

    Soak Tuvar/Toor dal along with Chana dal overnight. If u forgot to soak overnight you can soak it 3 hours prior grinding it. This is done to make dals soft. My amma & MIL used to soak dals 20 to 30 minutes before grinding.Its based on the type of dal you get.

    Wash & Chop beans into small pieces. Pressure cook it while cooking rice.

    Grind the dal along with chillies, turmeric, salt, hing & curry leaves. Add very less water while grinding. You should grind the mixture coarsely. Keep aside.

    Heat 3 tbsp of oil in a pan & add the grinded mixture. Use a spatula & break it into small pieces while frying. Add the cooked beans add salt if required & cook for few minutes.

    Your tasty Parupu usili is ready to be served.


    I searched online for a easy version of cooking this recipe. I came across this website which most of you people would have come across. This is the best version i came across online. Easy for beginners too. Do have a look.

    Source: Edible Garden (cooking & me)

    Share your valuable comments if you feel my recipe is useful & worth sharing,

    Follow me in Twitter
    Join me on Google plus
    Pin my post on Pinterest to keep updated with new recipes on my blog..

    Thank you for spending your time & visiting my blog.

    Share Button

    Contact Page


    Your Name :
    Your Email: (required)
    Your Message: (required)

    Wednesday, 26 June 2013

    Sitemap


    Healthy Ginger Tea Recipes


    Ginger Tea Recipe


    Ginger tea is a spicy conventional beverage consumed & enjoyed regularly in & around Asia and also popular across the world.

    Amma used to prepare it when we get cold or during rainy seasons & serve with hot pakodas or samosas.

    The Herb contains plenty of anti-oxidants & consumed as a delicacy, medicine, or spice. India has over 30% of the global production share leading China, Indonesia, Nepal & Thailand.(Source:Wiki)

    For Womens/ladies, placing hot towel drenched completely in ginger tea & applied on stomach provides relief from menstrual cramps.

    Ginger combined with any one of these : honey, apple, lemon is a great reliver of stress which should be a 'must-have' in your kitchen. I will share with you some of the tea recipe that can be prepared with Ginger.

    1. Ginger & honey Tea :

    Ingredients
    • Ginger : 2 tbsp
    • Honey : 1 tbsp(based on taste)
    • water : 1 cup


    Wash & peel 2 tbsp of ginger. Slice or cut into small pieces. Heat a cup of water & add ginger. Let it simmer for ten minutes. Switch off & strain the boiled ginger water into a tea cup. cover the cup fore few minutes till the aromatic elements immerse well. Add a tbsp of honey & drink at room temperature.

    Health benefit:
    • Stomach upset reliever
    • Arthritis Treatment
    • Fighting Infections
    • Cold,cough & illness
    • Motion Sickness


    Source: Ginger Tea health benefits

    2. Ginger lemon Tea Recipe

    Ingredients
    • Ginger : 2 tbsp
    • Lemon : Slices
    • Water : 1 cup


    Wash, peel ginger & cut into small pieces. Add slices of lemon, chopped ginger into a cup of hot water & cover it with lid. Use a fork or your hand & extract the lemon juice. Strain & drink at room temperature.

    Health benefits:
    • Ginger lemon tea stimulate digestion(Source: the Daily Mail)
    • Lemon is known for its anti-bacterial & immune-boosting powers.
    • Ginger's anti-inflammatory properties prevents cancers


    3. Green tea

    Ingredients
    • Green tea leaves
    • Water-1 Cup


    Boil a cup of water & add the green tea leaves. Let it stay for few minutes. Strain the water & drink at room temperature. Don't let tea leaves stay for longer as tea will taste bitter.

    Tulasi leaves can also be added in green tea for additional blend.
    Health Benefits:
    • Oral Health
    • Bone Health
    • Weight Loss
    • Cancer
    • Heart Health

    Source: Benefits of green tea

    4. Apple Ginger tea I was not aware about this tea until i came across that it was a source of medicine for cancer treatments.

    Ingredients
    • Ginger : 1/2 slice
    • Apple : 1/2 Sliced(Remove Seeds)
    • Water : 1 cup


    Grind & Juice apple & ginger & add it to a cup of hot green tea. Drink immediately.

    Health Benefit:

    Ginger in this tea helps to reduce nausea associated with cancer treatment.
    Source: cancer treatment:Apple ginger tea

    Share your valuable comments if you feel my recipe is useful & worth sharing,
    follow me in Twitter
    Join me on Google plus
    Pin my post on Pinterest to keep updated with new recipes on my blog..

    Thank you for spending your time & visiting my blog.


    Share Button

    Healthy recipes for working women


    Healthy recipes for working women I was having this idea to allot a separate page for us, i mean ladies, women's, girls who fave lots of stress in this stressful world.

    Regular time pressures to stress of polluted environments, we sometimes feel like we are swimming in a pool of stress & gasping for air. Along with this working women/mothers face busy schedules & often feel overwhelmed,stressed when they face their never-ending TO-DO-LIST.


    So I decided to allot a special page for these special ladies & post some healthy recipes & tips for them.

    Tips for working women/ladies:

    • 1. Allot time for yourself, minimum 30 minutes a day.
    • 2. Exercise regularly to burn off the stress busters.
    • 3. Manage your stress meter :Know to step back and cool down.
    • 4. Take veggies, fresh fruits & water.Give your health the best to perform at its best.
    • 5. Keep a positive attitude.
    • 6. Relax with outdoor activities along with friends and family,a great way to relax.
    • 7. Hear your favorite music & relax for some time.
    • 8. Stop worrying- it does not really get things completed sooner or quicker.
    • 9. Find what stress you more & deal to solve it the next time it arises.
    • 10. Each day is a gift, smile & be happy you are a part of the bigger picture.


    Healthy Recipes to relax your stress

    I will share some recipes that relax you & keep you healthy.

    1. Ginger Tea Recipes : Look in for all types of ginger tea recipes

    Healthy Ginger Tea Recipes Healthy Ginger Tea Recipes | Tea Recipes

    2. 15 Minutes Moong dal recipe : Easy to quick, no need to spend hours of extra time in your kitchen.
    15 minutes Moong dal 15 MInutes Moong Dal Recipe

    Share your valuable comments if you feel my recipe is useful & worth sharing,
    follow me in Twitter
    Join me on Google plus
    Pin my post on Pinterest to keep updated with new recipes on my blog..

    Thank you for spending your time & visiting my blog.


    Share Button

    Tuesday, 25 June 2013

    Healthy Godhuma Dosa


    Godhuma Dosa Recipe 

    Godhuma dosa can be prepared in less than 20 minutes. This recipe is very helpful for working people. When we run of time this dosa is an blessing in disguise. Amma used to make it mostly for our dinner & we used to enjoy this crispy godhuma dosa with just mulagai podi or any khara chutneys. It goes too well with all. Amma used to have this even with sugar.. Just try this out with your own side dish combinations.


    Ingredients
    • 1 cup - wheat flour
    • 1 cup - Rice flour(optional)
    • Onions- 1
    • Chilly - 3
    • Oil-1 tbsp
    • Water - required
    • Mustard seeds- 1 tbsp
    • Urad dal- 1 tbsp
    • Curry leaves- few
    • salt- to taste

    Cooking time
    20 minutes
    Serves
    2
    Method
    Mix wheat & rice flour Slowly adding water & mix well without forming lumps. Chop onions & green chillies & add it to the varter. Heat a tbsp of oil & splutter mustard, urad dal & add it with curry leaves. Heat the tawa & pour the barter forming an outer circle, then fill in the center.


    Add oil around the corner. If few holes form just ignore as it will make the dosa more crispier. Godhuma dosa takes longer time to cook so be patience & flip once the edges pop up. Wait till both sides get fried & serve hot with your favorite side dish.
    This is such an easy recipe to prepare & an healthy one too.

    Share your valuable comments if you feel my recipe is useful & worth sharing,
    follow me in Twitter
    Join me on Google plus
    Pin my post on Pinterest to keep updated with new recipes on my blog..

    Thank you for spending your time & visiting my blog.


    Share Button

    Panner Butter Masala Recipe


    Paneer butter masala - home made panner
    Let us see how to prepare Panner Butter Masala at your home. Its healthy to prepare home made panners instead of buying at outdoors. Will share with you all how to prepare home made panner.

    Home made Panner

    Panner is nothing but an cheese prepared out of milk. Its good for health as it is made up of protein. I was eager to try making home made panner when i first came across about it in Google.

    I tried preparing & found that home made ones are more spongy & fresh.

    Follow the below steps to get health protein rich home made panners:

    Boil a packet of milk, add lemon juice & stir with a spatula. Boil until it curdles & whey gets separated. Switch off & after its cools down, filter out whey. Wash the separated curd & tie it to a cheese cloth. Keep under an heavy object for 6 hours & our panners are ready. Cut it into small square blocks & refridgerate it for 4 to 5 days.. Then use when required.


    For 1 litre of milk you ll get panner 175 gms approx ..


    Now i will share the recipe of Panner butter masala

    Ingredients

    • Tomato puree - Grind 3 to 4 tomatoes to get 1 cup of Puree
    • Onions- Chop & grind 2 onions to form a paste

    • coriander powder - 1 tbsp
    • Cashews - 2 to 3 tbsp
    • Ginger - 1 piece

    • Garam masala powder - 1 tbsp
    • chilli powder- 1 tbsp
    • Turmeric - 1 tbsp
    • Salt - to taste

    • Butter & oil - 3 tbsp (2+1)
    • Coriander leaves- finely chopped

    Serves
    2

    Preparation Method

    Soak cashew in hot water & grind it with ginger,coriander powder. Take a pan fry Panner in a tbsp of oil till turns golden brown. Dont over fry the panner. Keep them aside. Heat 2 tbsp of butter add garam masala powder and add onion paste. Saute till the onion paste turn golden.


    Add the grinded ginger,cashew paste & saute it.. Add tomato puree & let it boil till raw smell leaves.wait till Oil get separated from the mixturte add required salt, turmeric powder &finely chopped coriander leaves.

    Add the cubed panner & give a boil..Our Hot punjabi Panner butter masala is ready to serve with Rotis/Chappatis..

    Share your valuable comments if you feel my recipe is useful & worth sharing,
    follow me in Twitter
    Join me on Google plus
    Pin my post on Pinterest to keep updated with new recipes on my blog..

    Thank you for spending your time & visiting my blog.


    Share Button

    Vazhakkai Podimas Recipe


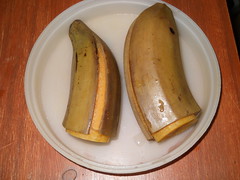
    vazhakkai podimas recipe- podimas Healthy Vazhakhai podimas: Vazhakhai podimas is an healthy recipe that can be prepared for an breakfast which can be served as an side dish for sambar or rasam.. Will share you all the e recipe of Vazhakkai podimas..

    Ingrediants
    • Vazhakai - 1
    • Oil- 2tbsp
    • Mustard seeds- 1 tbsp
    • Urad dal
    • Red Chilli - 2
    • onion - Sliced(optional)
    • Hing- a pinch
    • Grated coconut - 1/4 cup
    • Lemon juice- 4 tbsp
    • curry leaves- few


    Serves
    Two

    Preparation Time
    15 minutes

    Preparation Method

    Take a kadai & pour water add Vazhakkai close it with a lid. Let it boil for a span of ten minutes. Turn off knob & after the vazhakkai is cooled, remove its skin & grate it.


    Keep aside.. Heat oil & add mustard, urad dal,after it start to splutter add sliced onions,salt,hing,curry leaves, chilly & fry for few minutes. Add grated Vazhakkai & cook for sometime..


    Add scapped coconut & mix for few minutes.. Switch off, add few drops of lime juice & mix.. Yummy vazhakkai podimas is ready to be served..

    Share your valuable comments if you feel my recipe is useful & worth sharing,
    follow me in Twitter
    Join me on Google plus
    Pin my post on Pinterest to keep updated with new recipes on my blog..

    Thank you for spending your time & visiting my blog.

    Share Button

    Crispy Onion Rava Dosa


    Rava dosa- recipe onion rava dosa

    Are u a working women? new to cooking? bachelors? Here is an quick instant recipe for you all that can be made in a jiffy. This dosa can be made very quickly & you can enjoy an complete dinner.


    Ingrediants

    • Semolina/ Rava - 1 1/2 cup
    • 1 Cup -All purpose Maida
    • Rice flour - 1 cup(optional, can be tried without using too)
    • Water- 2 1/2 cup
    • Thick Curd - 1/4 Cup
    • Green chilly - 2 (sliced)
    • Onion - 1 to 2(finely chopped)
    • Salt - To taste
    • Cumin seeds/Jeera - 2 tbsp
    • Whole black pepper- few
    • Mustard seeds - 1 tbsp
    • Curry leaves - few
    • Oil - 1 tbsp
    • hing - a pinch
    Serves
    Two

    Cooking Time
    20 Minutes

    Method
    Take a bowl & add Semolina, Maida, Rice flour with curd & mix well with a spatula. Break lumps while mixing and add sufficient water. Add salt, hing, sliced onions & green chillies, curry leaves, pepper. Heat a pan add oil, add splutter mustard seeds & cumin seeds & add it to the batter. Keep aside for 20 minutes.

    The batter should not be much watery. The below batter would be perfect for preparing the dosa..


    After 20 minutes, Heat Tawa & add few 1 tsbp of oil. Mix the batter again so that rava doesn't stay at the bottom.. Rava dosa should not be made like ordinary dosa..


    We should pour the batter over the tawa starting from the outer corner.. spread the batter slowly & form a circle. Add 1tbsp of oil. Turn the dosa over the other side once the dosa starts to come up. Serve hot with any chutneys once crisp onion dosa is ready..Rava dosa goes well with any types of chutney.. I ll go for an yummy Tomato chutney or Onion chutney..

    Note: Onion can also be added after you pour the batter over the tawa..

    Share your valuable comments if you feel my recipe is useful & worth sharing,
    follow me in Twitter
    Join me on Google plus
    Pin my post on Pinterest to keep updated with new recipes on my blog..

    Thank you for spending your time & visiting my blog.


    Share Button

    Semolina/Vermicelli Semiya Upma


    semolina upma- vermicelli semiya upma

    Upma, an common dish in South India is prepared from dry-roasted semolina. Upma varies depending on our choice of adding different types of veggies & spices to make the dish more appealing to serve.

    I will share on how to prepare simple Vermicelli Upma & Coriander Chutney in a jiffy.

    Preparing Time
    30 minutes

    Serves
    Two

    Ingrediants
    • 1 Cup Vericelli
    • Onion -1
    • Tomato -1
    • Vegetables- If needed(Optional)
    • Peanuts- If required(optional)
    • Salt- To taste
    • Curry leaves- Few
    • Oil- 1 tsp
    • Mustared seeds - 1 tsp
    • Toor dal - 1 tsp
    • Green Chilli - 2(Red Chilli also be used during seasoning)
    • Water - 2 cup
    • Hing- a pinch


    Method

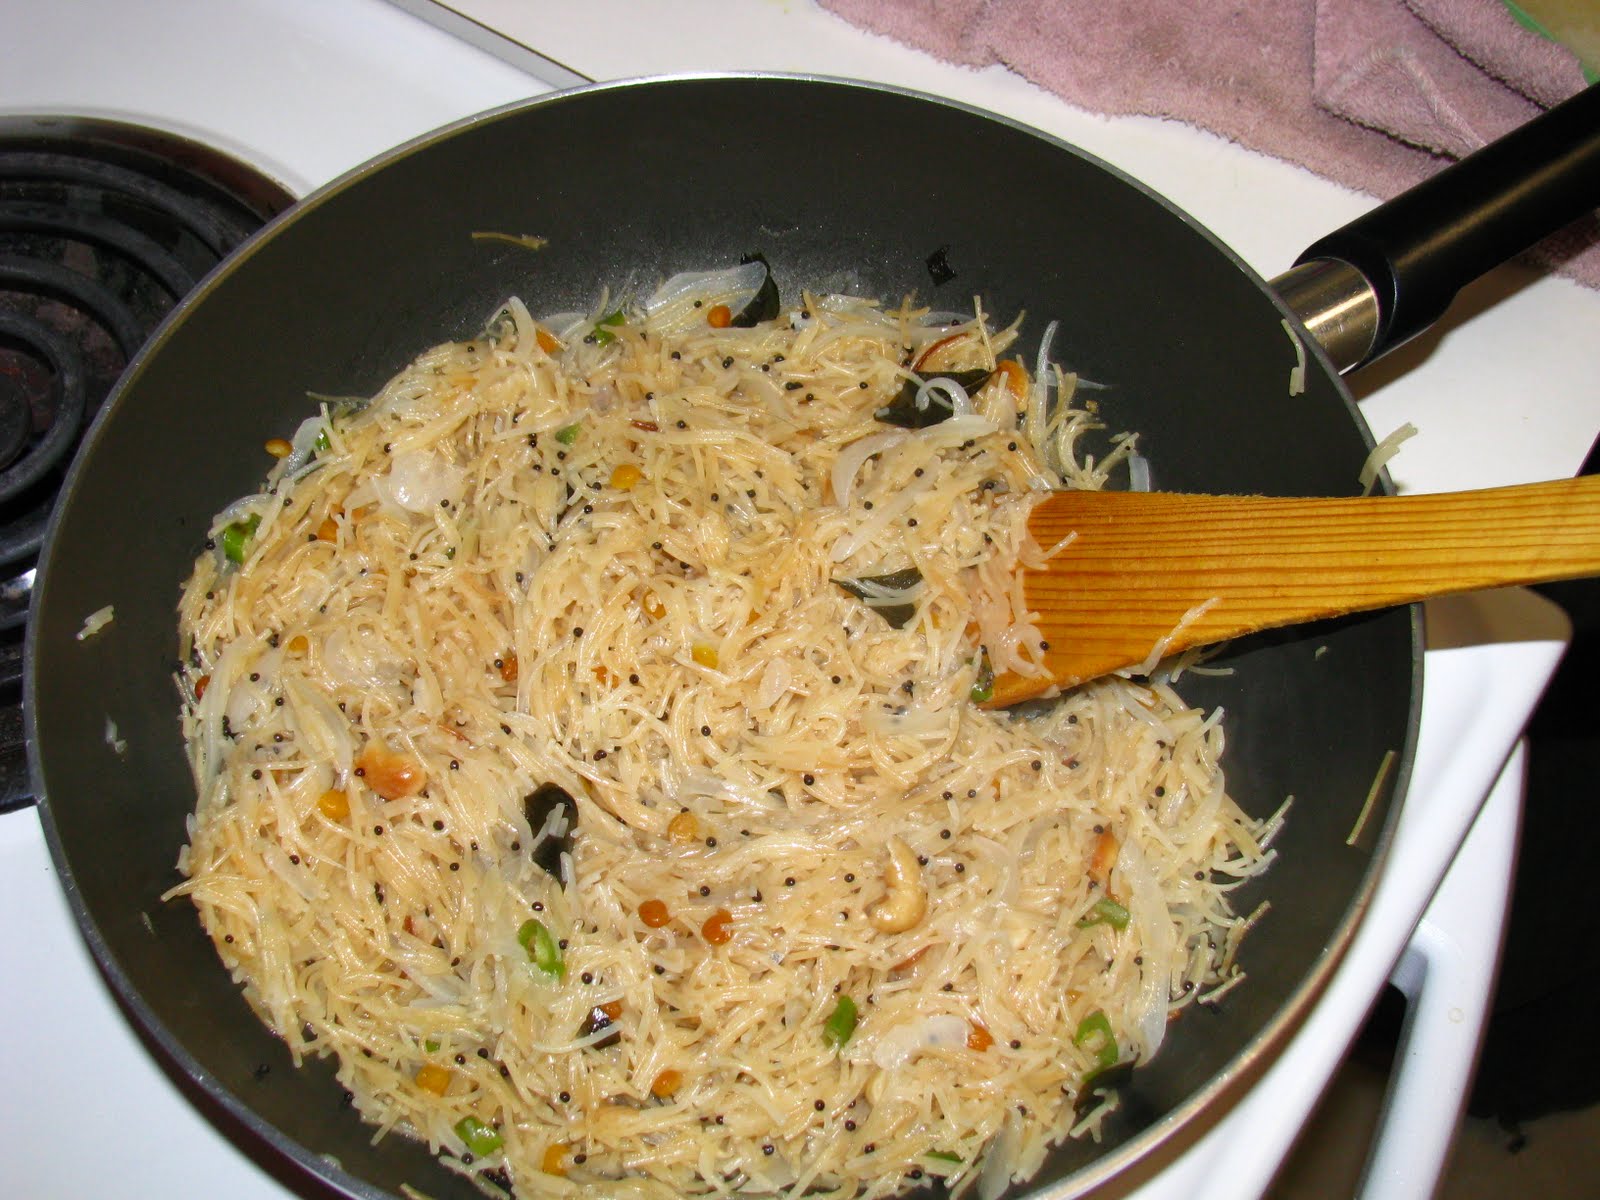
    Heat a pan and add a tbp of oil, add mustard seeds & urad dal to splutter. Add nicely sliced onions & fry till golden brown. Then add tomato & fry till raw smell leaves. Water should not be added till tomato is fried.. Vegetables, peanuts, hing,curry leaves can be added now.. Add water & salt to vegetables & let it cook for few minutes.. Once water gets boiled add vermicelli slowly stirring it now & then.. Our hot Vermicelli upma is ready to serve..


    Vermicelli Upma can be served with any types of chutneys..


    Coriander Chutney
    Ingredients:

    • Mustard seeds- 1 tbsp
    • Grated Coconut - 3/4 cup
    • Green chilly - 3
    • Urad dal- 1 tbsp
    • Corinader leaves - a handful
    • Salt - To taste


    Method:

    Grind the above ingredients with required water. Heat pan & add a tbsp of oil & fry mustard seeds with urad dal ..


    Mix with the grinded chutney & chutney is ready to be served..


    Share your valuable comments if you feel my recipe is useful & worth sharing,
    follow me in Twitter
    Join me on Google plus
    Pin my post on Pinterest to keep updated with new recipes on my blog..

    Thank you for spending your time & visiting my blog.


    Share Button

    Recipe of Rava Kichadi


    Rava kichadi recipe - rava kichadi I was thinking what to cook for breakfast today morning, when this dish popped up in my mind.Its nothing but Rava kichadi an yummy dish made out of roasted rava and few veggies...
    Let me post the recipe of this wonderful dish.

    Rava Kichadi is very easy to prepare & would be loved by all people in our family..

    Time to Prepare : 30 Minutes

    Serves : 4

    Ingredients:
    • Pre-roasted Sooji Rava- 2 cups
    • Chopped vegetables of your choice from these - carrots, peas, potatoes,beans
    • Oil - 1 tbsp
    • Mustard seeds,Urad dal 1/2 tbsp
    • Green chillies- 2 or 3 (chopped ones)
    • Onion- 1 sliced lengthwise
    • Tomato- 1 sliced into small pieces
    • Ginger - 1/2 tbsp chopped finely
    • Hing- a pinch
    • Turmeric powder- 3 pinch
    • Finely chopped coriander leaves - for garnish
    • Salt - To taste

    Method: Add few drops of oil in a pan & roast the rava till it turns light brown in color.. Should not over roast the rava as it may spoil the taste.. Keep it aside in a bowl.

    Add 1 tbsp of oil & add mustard to splutter.Then add urad dal & fry Onions till translucent.Add the ginger,green chillies, and the sliced tomatoes & fry in medium flame for a minute.

    Pour 4 to 5 cups of water & add chopped vegetables,turmeric powder,salt,hing & let it boil for some time. After the vegetable are cooked add the roasted rava slowly by stirring it now and then with a spatula.. This is done to avoid formation of lumps in boiling water..


    Stir till the thick consistency of the rava is visible.Turn off the knob add coriander leaves for garnish & serve hot.

    Rava kichadi can be had with any kinds of chutneys..

    Thats it as of now.. Will meet you all with another wonderful dish soon :)


    Share your valuable comments if you feel my recipe is useful & worth sharing,
    follow me in Twitter
    Join me on Google plus
    Pin my post on Pinterest to keep updated with new recipes on my blog..

    Thank you for spending your time & visiting my blog.

    Share Button